Marble Sort Level 192 Walkthrough Solution | Marble Sort 192
How to solve Marble Sort level 192? Get instant solution for Marble Sort 192 with our step by step solution & video walkthrough.
Marble Sort Level 192 Guide: The Double Center Crates Trap
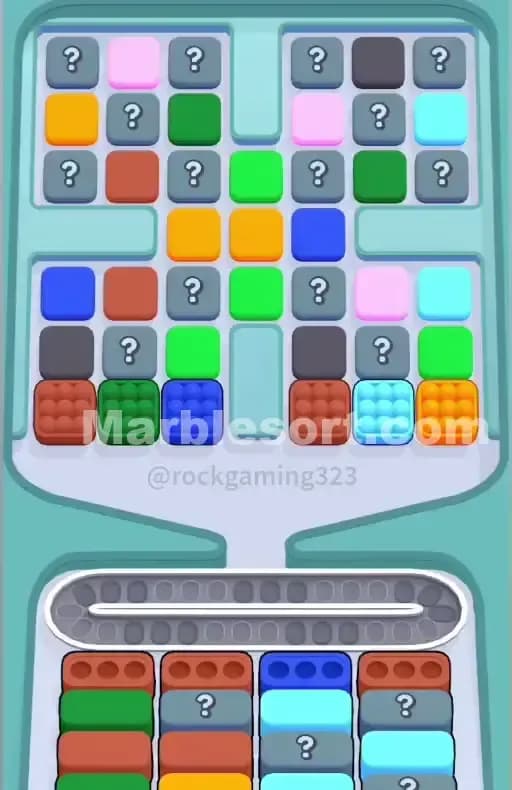
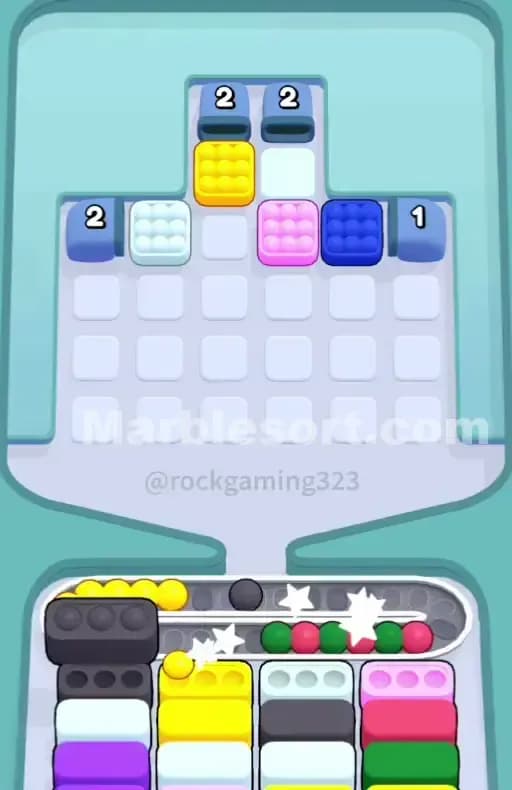
Marble Sort Level 192 is entirely controlled by a massive roadblock right in the middle of the board. Two wooden Crates are stacked vertically in the center of the Top Tray, cutting the playable area in half. You cannot access the middle marbles. You cannot cross over. You have to work the left and right flanks independently.
The dominant colors you have to deal with early are Yellow, Light Blue, Brown, and Green. The top board is shaped like a thick cross. Surrounding that double Crate stack are four Tunnels—two at the very top, and one on each side. The bottom Boxes are stacked deep. The front row demands Green, Green, Yellow, and Light Blue.
The pressure sets in immediately. You need Green marbles to clear the left side of the bottom Boxes, but the Green marbles are buried.
The Double Center Crates Layout in Marble Sort Level 192
To beat this board, you must understand exactly how the Top Tray is built to trick you.
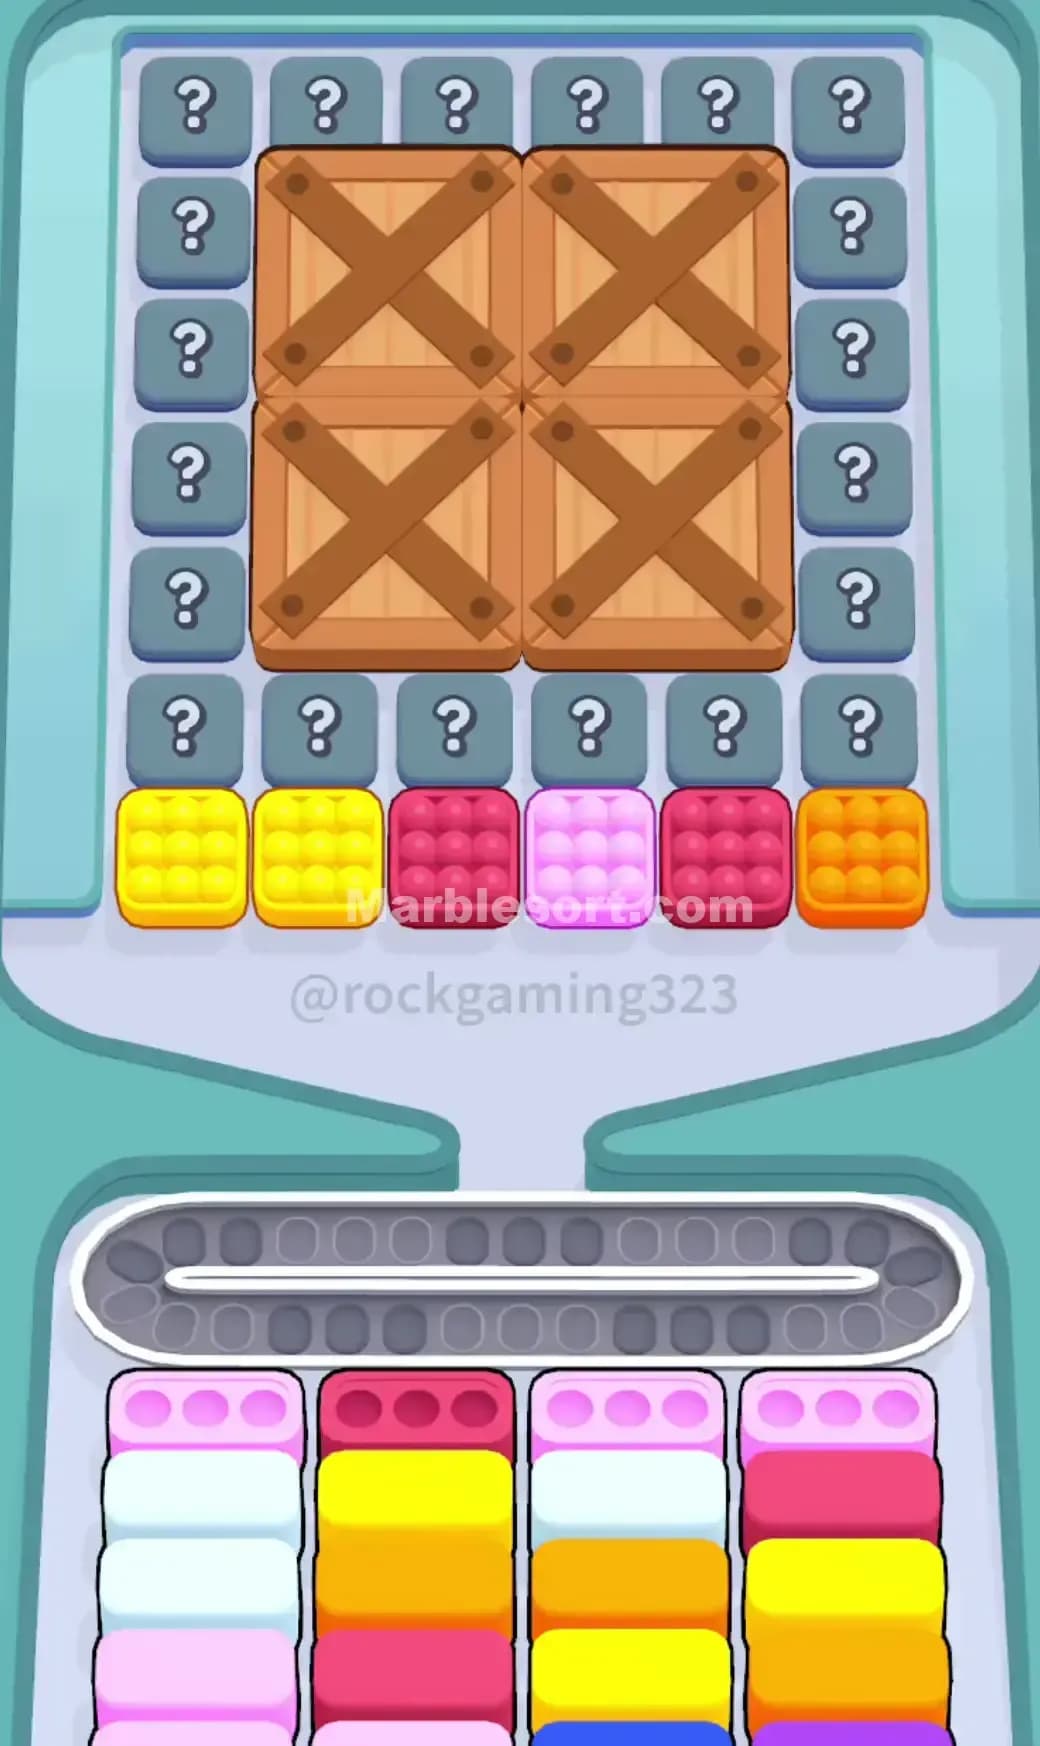
Look at the bottom row of the Top Tray. From left to right, you have a Brown marble, a Dark Blue marble, the lower Crate, a Yellow marble, and a Light Blue marble. Directly above those, you have Orange, Light Pink, Cyan, and Dark Grey.
Now look down at the bottom Boxes. The immediate active targets are two Green Boxes on the left, a Yellow Box, and a Light Blue Box.
This is where Marble Sort Level 192 gets nasty. The right side matches up perfectly. You have accessible Yellow and Light Blue marbles in the Top Tray, and you have active Yellow and Light Blue bottom Boxes waiting for them. The left side is a total disaster. You need Green marbles to activate those two front-left Boxes. But the Green marble is trapped on the third row up on the left side, pinned underneath a Brown marble and two Orange marbles.
Dark Blue is the ultimate bait here. It sits right on the front line of the Top Tray. It looks so easy to grab. Do not touch it. There is no Dark Blue Box anywhere near the front of the queue. Dropping it down will permanently eat a slot on your Conveyor Belt during the most critical part of the level.
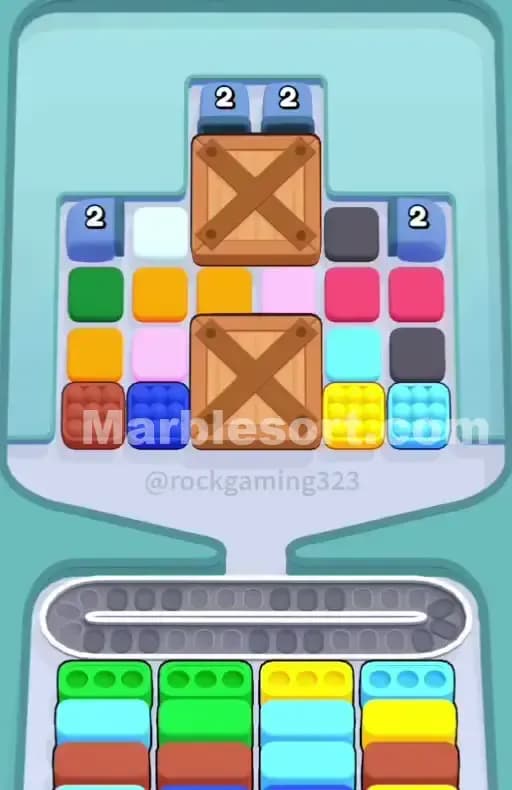
Clearing the right side first is mandatory. Breaking through the Brown and Orange marbles on the left to unearth the Green marble is your second priority. Once you clear three adjacent marbles, the lower Crate shatters. That single clear changes the entire flow of the board.
Marble Sort Level 192 Step-by-Step Walkthrough
Follow this exact order. The Conveyor Belt has very little margin for error early on. If you load up the wrong colors, you will jam the board before the first Crate even opens.
Breaking the Front Line in Marble Sort Level 192
Your immediate goal is to feed the right side and dig out the left side.
- Tap the Yellow marble on the bottom right of the Top Tray. Send it into the waiting Yellow bottom Box.
- Tap the Light Blue marble on the far right. Drop it into the front Light Blue Box.
- You now have Cyan and Dark Grey marbles exposed on the right. Leave them alone. You need to fix the left side now.
- Drop the bottom-left Brown marble onto the Conveyor Belt. There is no active Brown Box yet, but you must move it to dig down. Let it sit on the belt.
- Drop the Orange marble that was behind it onto the Conveyor Belt.
- You have now exposed the Green marble on the left flank. Tap it immediately to feed the front Green bottom Box.
- With the front Boxes clearing, a Cyan Box and a Brown Box will slide forward from the second row.
- Send the Brown marble from your Conveyor Belt into that active Brown Box.
Cracking the Crates in Marble Sort Level 192
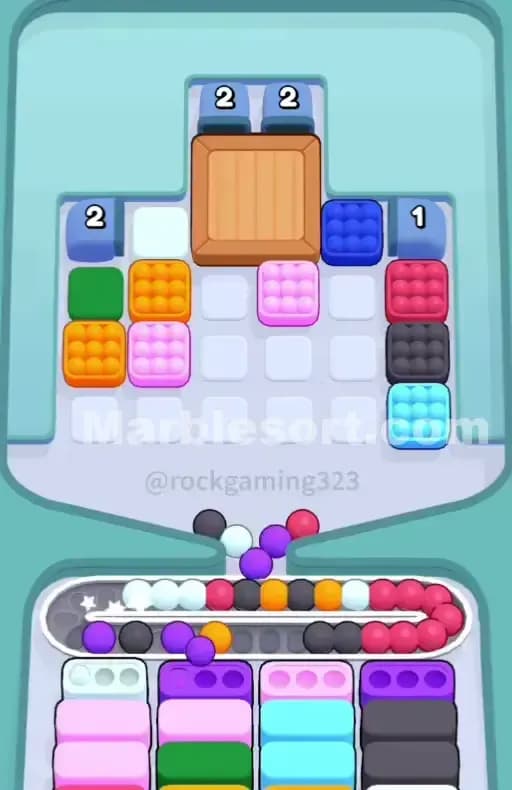
With the front lines broken, the board shifts. The lower Crate is now vulnerable.
- Route the exposed Cyan marble on the right side of the Top Tray into the newly revealed Cyan bottom Box.
- Clearing these inner marbles triggers the destruction of the lower Crate. It will vanish, revealing a cluster of hidden marbles—mostly Light Pinks and Whites.
- The bottom Boxes will now push up Yellow, Brown, and Dark Grey targets.
- Drop the Dark Grey marble from the right flank into the active Dark Grey Box.
- Start matching the newly revealed Light Pink and White marbles. Pulling these clears the space directly under the upper Crate.
- Keep moving up the middle channel. Once you clear three marbles adjacent to the top Crate, it breaks open.
- The board is now split into remaining pockets. Watch the Conveyor Belt pressure here. Only drop colors that have an active, visible Box in the front two rows.
Clearing the Tunnels in Marble Sort Level 192
The final phase is all about managing the hidden drops. The Crates are gone, but you still have four active Tunnels.
- The bottom Boxes will now cycle into deep back-row colors: White, Purple, and a final set of Greens.
- Tap the remaining visible White and Dark Grey marbles in the center of the Top Tray.
- As the center empties, the side and top Tunnels will begin spitting out their reserves.
- Do not panic-tap as the Tunnels empty. Wait for the marbles to settle.
- Match the final Purple and Green marbles coming out of the Tunnels into the back rows of the lower Boxes.
- Keep the Conveyor Belt entirely clear for the last few stragglers to finish the board.