Marble Sort Level 483 Walkthrough Solution | Marble Sort 483
How to solve Marble Sort level 483? Get instant solution for Marble Sort 483 with our step by step solution & video walkthrough.
Marble Sort Level 483 Guide: The 9-Marble Cluster Trap and Connected Boxes
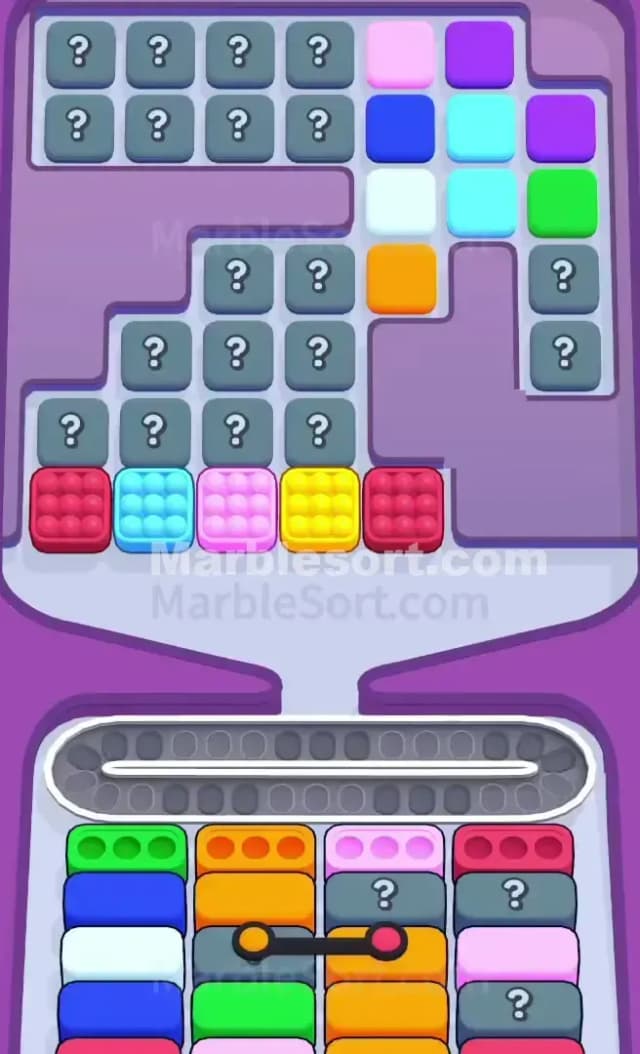
This board is a masterclass in baiting you into an early game over. Marble Sort Level 483 drops you in front of a massive wall of marbles, but the real enemy is your own limited space. The dominant colors here are Red, Light Blue, Pink, and Yellow, but they are bundled into giant 9-marble clusters right at the front edge of the Top Tray.
If you just start tapping those giant clusters, your run will end in ten seconds. The lower Boxes only hold three marbles at a time. Releasing a 9-marble block into a single matching Box means six marbles instantly flood your Conveyor Belt. Do that twice, and the board jams completely. To survive, you have to carefully peel back the top layer to reach the Connected Boxes hiding in the middle of the lower columns.
The unbalanced tower pattern in Marble Sort Level 483
Look closely at how this specific board is arranged. It is built to choke your Conveyor Belt immediately.
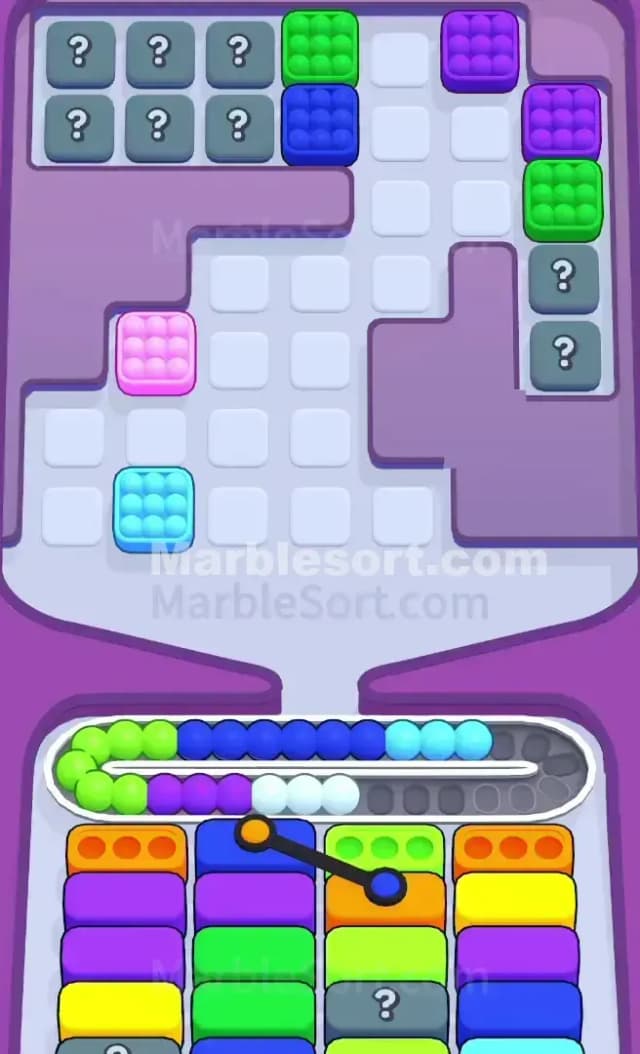
The Top Tray is split into two distinct zones. On the left and middle, you have a rigid staircase formation made entirely of grey Hidden Box blocks (the ones covered in question marks). You cannot see what colors are inside them, making planning incredibly difficult. Guarding this staircase is a front row of five massive 9-marble clusters: Red, Light Blue, Pink, Yellow, and another Red on the far right.
The right side of the Top Tray is a vertical tower of exposed colors. You can clearly see Pink, Purple, Dark Blue, a smaller Light Blue, Green, and an Orange cluster buried near the bottom.
Now look at your lower Boxes. You have four narrow columns. The very top layer of these columns gives you exactly four available targets: Green on the far left, Orange in the second column, Pink in the third, and Red on the far right.
This is where the trap snaps shut. You have massive Light Blue and Yellow clusters front and center in the Top Tray, but absolutely zero Light Blue or Yellow Boxes available at the bottom. Tapping those front-center clusters is pure bait. It will permanently brick your Conveyor Belt.
Your entire midgame is dictated by the Connected Boxes sitting in the third row down, tying the second and third columns together. You cannot clear one side without the other.
Marble Sort Level 483 Step-by-Step Walkthrough
You have to play the opening moves with extreme precision. Your Conveyor Belt is going to ride at near maximum capacity for the first half of this board. Do not panic when the belt gets crowded. Just stick to the release order.
Surviving the front row bait in Marble Sort Level 483
The opening taps dictate whether you win or lose. You must clear the top layer of the bottom Boxes to reveal the colors hiding underneath.
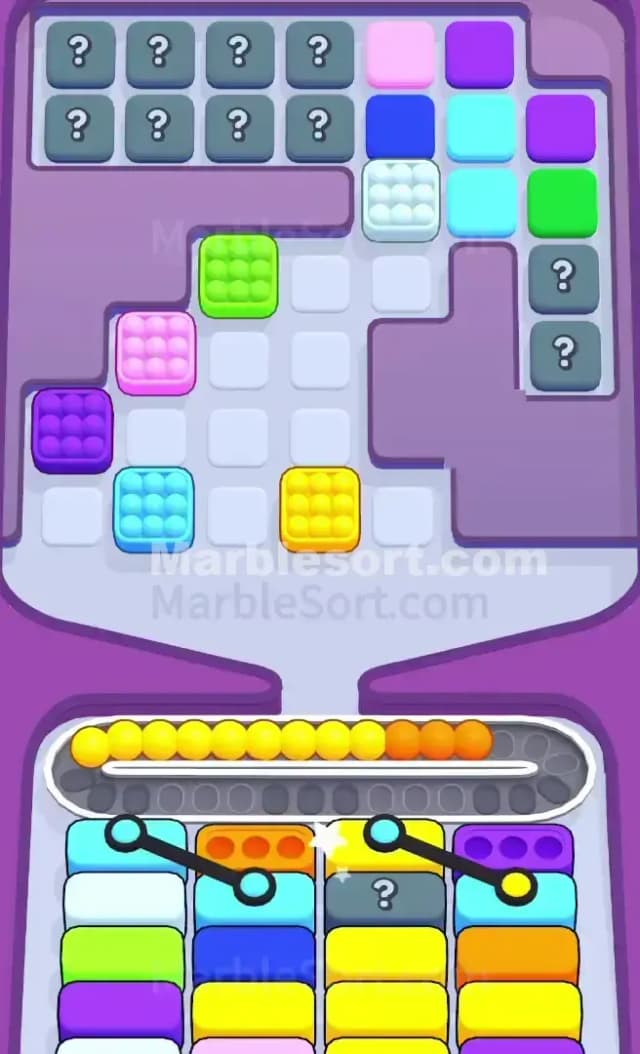
- Tap the front Pink cluster. You have a Pink Box sitting at the top of the third column. Releasing the Pink cluster fills that Box immediately. Six Pink marbles will overflow onto your Conveyor Belt. This is unavoidable and necessary to open the column.
- Tap the far-right Red cluster. You have a Red Box at the top of the fourth column. Just like the Pink move, this fills the Box and dumps the remaining Red marbles onto the belt.
- Do not touch the Light Blue or Yellow clusters. Leave them completely alone. You do not have the bottom Boxes to support them yet.
- Evaluate the newly revealed Boxes. Clearing the top Pink and Red targets uncovers a Hidden Box in column three and another Hidden Box in column four. If either of these reveals a color that matches the junk currently clogging your Conveyor Belt (Pink or Red), you are in luck. They will automatically suck those marbles off the belt.
Breaking the Connected Boxes in Marble Sort Level 483
Once you dig a couple of layers deep into the bottom columns, you will hit the main roadblock.
- Focus on the second and third columns. You will see two grey Boxes linked by a thick black line. These Connected Boxes will not activate or drop until the targets sitting directly above them are completely cleared.
- Pull from the right side tower. You need Green and Orange to clear the top left columns. Look at the exposed tower on the right side of the Top Tray. You will need to carefully release the Dark Blue, Purple, and Green clusters over there to dig down to the Orange marbles.
- Manage the Conveyor Belt bleed. As you tap the smaller clusters on the right side of the Top Tray, they will take up space on your belt. Only pull a color if you have a visible, accessible Box for it.
- Trigger the staircase reveals. As you start moving marbles out of the right side, the grey Hidden Box staircase on the left side of the Top Tray will slowly start to unlock. Whenever a block flips and reveals a color, check if it matches a desperate need on your bottom columns.
Clearing the final columns in Marble Sort Level 483
The late game shifts into a test of patience. Once the first set of tied boxes clears, the board will violently shift.
- Watch out for the second tie. As you push into the bottom half of the columns, a second set of Connected Boxes will often drop into play, usually linking a Dark Blue and an Orange target diagonally. You must prep your top tray releases to hit both of these evenly.
- Dump the Yellow and Light Blue. Once the lower columns are fully exposed and you finally see Yellow and Light Blue Boxes appear at the bottom, you can safely tap those massive clusters that have been sitting in the front row since the beginning.
- Burn through the remaining Hidden Boxes. By the end, your only remaining pieces will be the back half of the grey staircase on the left. Keep your Conveyor Belt entirely empty so you can blindly tap these hidden blocks one by one, letting them safely sort into the completely open bottom rows.
Patience is your best weapon here. Respect the space on the belt, ignore the front row bait, and strictly dig toward the tied targets in the middle.